You're welcome to embed this image in your website/blog!
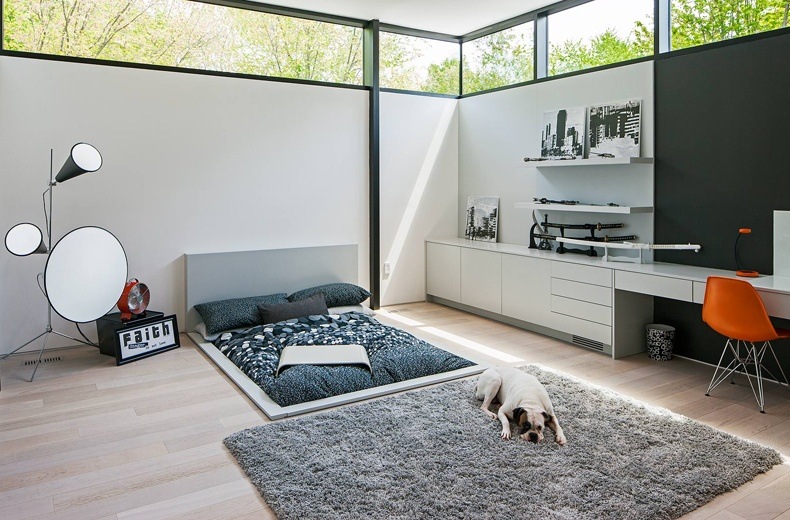
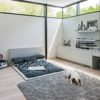
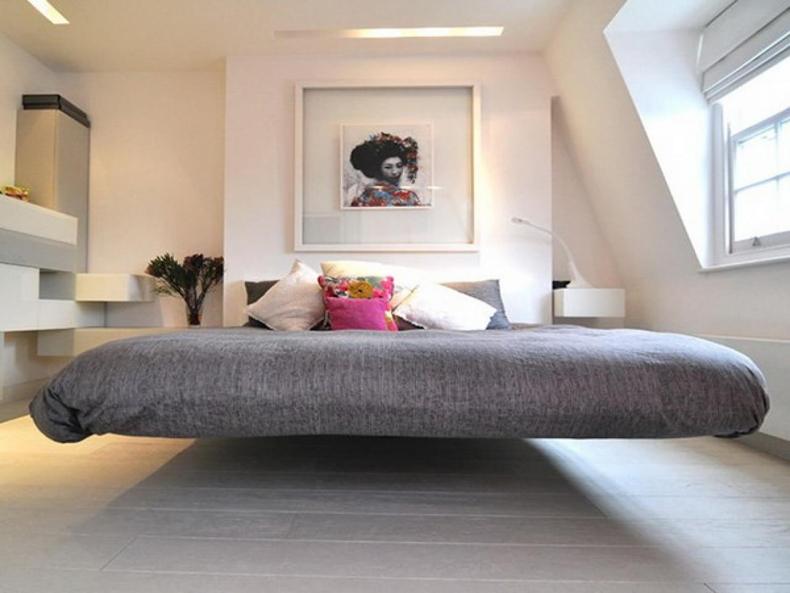
<img src="https://thebestwoodfurniture.com/wp-content/uploads/2017/03/Modern-Architecture-With-Sunken-Bed.jpg" alt="Sunken Bed Frame"><br><p style="text-align:center"><a href="https://thebestwoodfurniture.com/plain-wood-bed-frame-ideas/sunken-bed-frame/" target="_blank">Sunken Bed Frame</a> - TheBestWoodFurniture.com</p>
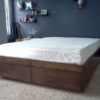
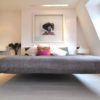
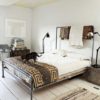
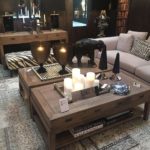
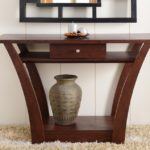
Gallery with other Sunken Bed Frame


Making Sunken Bed Frame
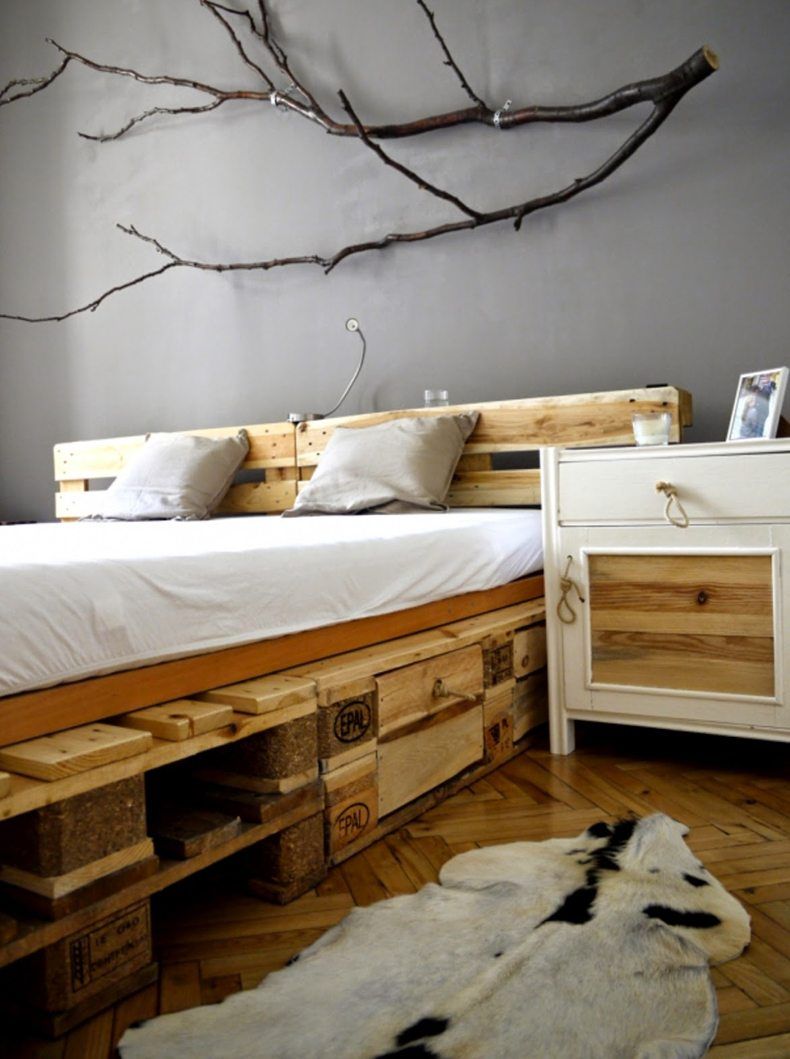
If you have never had an experience sleeping in sunken bed frame, hurry to correct it. All you need is just a custom made a hole in the floor and a mattress, with of course a sheet, blankets and pillows. Maybe you are the man who prefers to sit on the floor, you will be glad to have such a nice and comfortable couch.
Well last time we did a sunken bed frame on this show things got a little bit weird. Now don't worry, I promise to keep my clothes on for this entire video. Now of course we have plans available in both SketchUp and PDF, and the dimensions we provide are for a king-size sunken bed frame to fit this internal space. If you have something different the good thing is bed frame with sunken mattresses are standard sizes so look up the size and subtract accordingly to bring the dimensions in to suit your needs.
Keep in mind, though, thickness could be an issue. Bed frames with sunken mattresses are different thicknesses, the amount of sunken bed frames you use could make it a little bit taller, so you may want to adjust the height of your legs to make sure this rail is located in the right place. You don't want your pillows and the sunken bed frame itself sliding under the rail, and you don't want it to high because it could get in the way of your design here. Now, let's talk about tools. Well, if you're new to The Wood Whisperer, hi, my name is Mark and I kinda like tools. I kinda like expensive tools sometimes, too.
I've got two examples of that right here, I've got the Festool Domino, a very quick way to make mortise and tenon joints, and the Multi-Router, okay, this is made by JDS, it's a really cool system, it costs about $2,600 bucks for the basic package so it's really expensive but it is a great tool, and as someone who does this stuff for a living, it's something I can justify having. Now, I do get some requests from people who want to see this tool in action. So, that's what we're gonna do today! You're gonna see both of these tools. If you want more accessible methods to make mortise and tenon joints, I've got an archive of a couple hundred videos showing more accessible tooling and methods that will allow you to get the job done. Hey guys, come here!
Now if you like the idea of the Multi-Router, there is a cheaper option out there, just look up the PantoRouter and you could find plans to build your own, or you could actually buy a preassembled kit, just look at the hybrid PantoRouter, should get you what you need. Alright, let's get to it. We'll get this party started with some nice eight quarter cherry stock. And the first order of business is the legs. I'm using boards that are wide enough to produce both leg halves side-by-side for the best grain and color match. I cut the boards to rough length, and then split the boards down the middle.
Each board is then milled flat and square. Since the legs will be 3 1/4 inches square, I trim the boards to 3 1/2 inches, giving me plenty of room for cleanup after the halves are glued together. Things will go faster if you glue two legs at a time. A nice even bead of squeeze-out lets me know that I have adequate glue coverage. Now I'll let those dry overnight. The legs can now be milled to 3 1/4 inches square and cut to final length at the chop saw. Each leg receives three fairly large mortises. Since we're doing loose tenon joinery here the rails also need the same mortises, so we'll put the legs aside and start prepping the rail stock. The rails range in size from six inches to two inches wide. I cut them to rough length with a jigsaw, and rough width and the band saw. Because these pieces are so long I'm starting with eight quarter stock and milling them down to an inch and a half. Having so much extra stock helps ensure that the final rails are nice and straight. Now let's play with the Multi-Router.

The platform slides smoothly in two dimensions while the router bit remains stationary, a deceptively simple design. After laying out my mortises all I need to do is line up the center line with the center line on the Multi-Router, clamp the work to the table, set my stops, and route away. As you can see this is very difficult to film, so let's skip to the end product. With these settings locked in I'll make the same mortise where appropriate in the other legs. Then all I need to do is line up the center line, and go. To make the adjoining mortise on the rail piece I could reset the vertical position of the router, or I could simply mill up a piece of scrap that will raise the height of the rails on the platform. With the scrap piece in place I can line everything up while also using a roller stand for extra support. To bad you can't see what's happening there, because it's really cool. And just like that, we have two perfectly matched mortises. The rest of the mortises are cut the same way, adjusting the stops as needed. This is pretty much as close as you can get to repeatable mortise perfection.
So what about the tenons? Those will be cut from some cherry cut-offs. The great thing about this method is that the board is milled to perfect thickness, making all of our tenons the perfect thickness in just one shot. And with perfectly consistent mortises, we know that these tenons will fit like a glove. Because the mortises have rounded edges we use a rounder bit to round the edges of the tenon stock. Notice I'm doing this routing before I cut the tenons to final length. And check out this fit. Hard to get any better than that. To make life easier later, I glue the tenon stock into the rails ahead of time.
Just be sure to remove the squeeze-out once the glue firms up. Now let's work on the vertical partitions. These are cut to 3/4 of an inch in thickness, and some of them will receive grooves for the panels, which are easily cut at the table saw using a feather board for support. To keep the grooves centered I run the piece through twice, flipping it around after the first pass. The pieces are then cut to the appropriate length using a stop block on the cross-cut sled. The smaller top partition pieces are cut here too, using a pencil to keep the piece secure, a trick I learned from the one and only David Marks.
Now with my rails lined up and clamped together, I'll mark center lines wherever a partition exists, giving me a nice reference point that I can use for my domino joinery. Now I just line up the tool with the center line and we're off to the races. The adjoining mortises and the vertical partitions are cut using the trim stop attachment. This keeps the small work piece safely in position while the mortises are cut. I find it easiest to do this operation with the tool upside-down, and for the smallest pieces, a clamp really helps to hold everything securely. Just like I did with the larger rail tenons, I'll glue the dominos in ahead of time. Now let's do a quick dry assembly. The partitions with grooves give us some vital information about the stock grooves that we need to cut in our rails. So I use a fine pencil to mark the groove locations. Since the pencil can't really reach all the way into that groove, I draw the full half-inch depth after disassembling the parts.
I'll use a quarter inch spiral bit in the router and an edge guide to make our grooves. I also attach a piece of scrap to act as a second fence that should help me better balance the router. It's slow work but if you push that bit too hard it's gonna break. the grooves all stop before hitting the mortises. Now let's talk about the sunken bed frame hardware. I'm using a simple hook system that will lock the side rails into the legs. A mortise is cut into the legs first, and then into the end grain of the side rails. After squaring the corners with a chisel, I notice that some of the hardware is a bit tight. Upon further inspection it's pretty obvious that the pieces are not all the same length. A few passes at the grinder and the pieces fit perfectly.
The female side of the hardware requires two deeper mortises for the attachment hooks. Those are easily made with a smaller bit at the Multi-Router. Now we'll cut a single taper into the headboard legs, and two tapers into the footboard legs. The final smoothing of the taper is done at the workbench. The legs get one more final detail at the top, a slight curve up toward the inside of the sunken bed frame. The top rails of our headboard and footboard receive a gentle curve. Using a long piece of scrap we'll draw the curve directly onto the work piece. At each end of the rail I clamp a small piece of scrap at a slight angle and position it so that the bending strip is flush with the corner. Now all I have to do is bring the bending strip up into the work piece, and pull it back a half inch at the center point.

The curve is marked with a pencil and then cut at the band saw. The final finessing is done using a flexible sanding strip. Putting pencil marks on a surface is really handy, as it lets me gauge my progress. Both top rails have the same curve, so feel free to use your first one as a template for the second. The final things we need to make are the panels. I'll be using some rustic-looking walnut for a striking visual impact. The boards are re-sawn down the middle, allowing me to create a like book-matched panel. One of the larger panels has a pretty significant knot, which I'll fill up with some epoxy containing a dark brown dye. Blue tape on the back end will prevent that epoxy from seeping out. Once the epoxy is dry I sand most of it away and then head to the drum sander to bring the boards down to their final thickness. Check out that cool book-matched grain.
By the way, when gluing up panels with parallel clamps, I recommend alternating clamps up and down to help promote even pressure, and ultimately panel flatness. The final length and width of our panels is measured directly from the dry assembled headboard and footboard. While my big panels are a bit too wide for the chop saw, I can still get the job done by flipping the partially cut piece over and carefully lining up the blade for a second cut. Works like a charm. A quick test-fit and we're ready to move on. Everything now receives and eighth-inch round over to soften the look and the feel. The small vertical partitions should have been rounded over before cutting them to length, but I didn't think that far ahead. So I turn my small router into a mini router table by clamping it upside-down in my leg vice.
All parts and pieces are then sanded up to 320 grit and it's time to apply the finish. I'll start with a coat of dewaxed shellac, specifically Bulls Eye Seal Coat. This first coat should help prevent excessive blanching, which often happens with cherry. Even with this little bit of shellac on the surface, the cherry immediately transforms into a rich, warm color. You might be wondering why I'm finishing before the final assembly. Put simply, because it makes sense. Some projects lend themselves better to pre-finishing than others, but in the case of this sunken bed frame it's gonna save us tons of time, and it'll give us better results in the end. I just need to take care not to get finish on any of the joints, which is pretty easy to do. Now for the real fun. Check out this wacky walnut. That's the good stuff right there. After a few hours I lightly sand the surface with 320-grit paper to remove any roughness. A light touch is really all that's needed.
Now keep in mind, if your sandpaper pills up like you see here, give the finish more time to cure. We're looking to make dust, like you see in the example on the left. The top coat I'm using is Satin Minwax Wipe-On Poly. I'll apply it with a cotton rag using smooth strokes and a light touch. As I move along, each pass overlaps the previous. While you do have time to go back and fix any mistakes that you see, you'll wanna work quickly and avoid overworking the surface. The partitions, legs, and rails are given the same finish treatment. Notice how I have these boards set up? Supported by the tenons I'm able to coat all four sides of the rails quickly and easily. From here, it's a rinse and repeat sort of thing. The next day I'll lightly sand the surface, only this time I'll use 500-grit sandpaper.
Using a brush attachment I vacuum the dust off the surface and prep for the second and final coat of poly. I'm going for a fairly light duty finish here, but if you need more protection, simply apply more coats of poly. After the finish dries we can start the assembly. I'm using West Systems epoxy for the added work time. These glue-ups are going to be tricky, and I can't risk the glue drying before the assembly is complete. The epoxy consists of a resin, a hardener, and I'm also adding a filler to make the mixture thicker and stronger. With glue in the mortises and on the tenons, I start by assembling the top of the footboard and work my way down. To help keep things aligned while the glue dries, I insert the rail tenons partially into the legs. Using cloth and cauls to protect the finish, I add a few clamps where needed. And once the epoxy is dry I can glue up the legs.
These should go on fairly quickly, so I'm just using regular PVA glue for this job. Now for the big clamps. These are over 80 inches long, and if you need something similar consider making your own pipe clamps for a more economical option, or simply link two shorter clamps together. The headboard is glued up the same exact way, only this time I was able to move a little bit faster and I did the entire glue up in one shot. To finish up I install the hardware into the legs and the side rails and try to assemble this thing myself. Well at this point you're probably wondering, where's the support system? Well my sunken bed frame is actually pretty unique.
It's on its own stand, we don't need one, so I didn't build it. But, I put it in the plan if you wanna see an example of a simple support system that you could build with strips on the rails, horizontal pieces running this way, and then some support in the center. Pretty straightforward and it should accomodate just about any boxspring bed frame with sunken mattress combination. Alright, so again, download those plans I hope you liked this build, it was a lot of fun. This was one of those personal projects that my wife's been bugging me to do for a very long time so it's always nice to get those honey-do things scratched off the list.


No Comments