- Plain Wood Coasters
- Birch Wood Projects: Shelves
- Birch Wood Projects: Bark Lamps
- Birch Wood Projects: Candleholders
- Birch Wood Projects: Personalized Candleholders
- Birch Wood Projects: Wood Clocks Handmade
- Holiday Birch Decoration
- Birch Wood Projects: Table Numbers
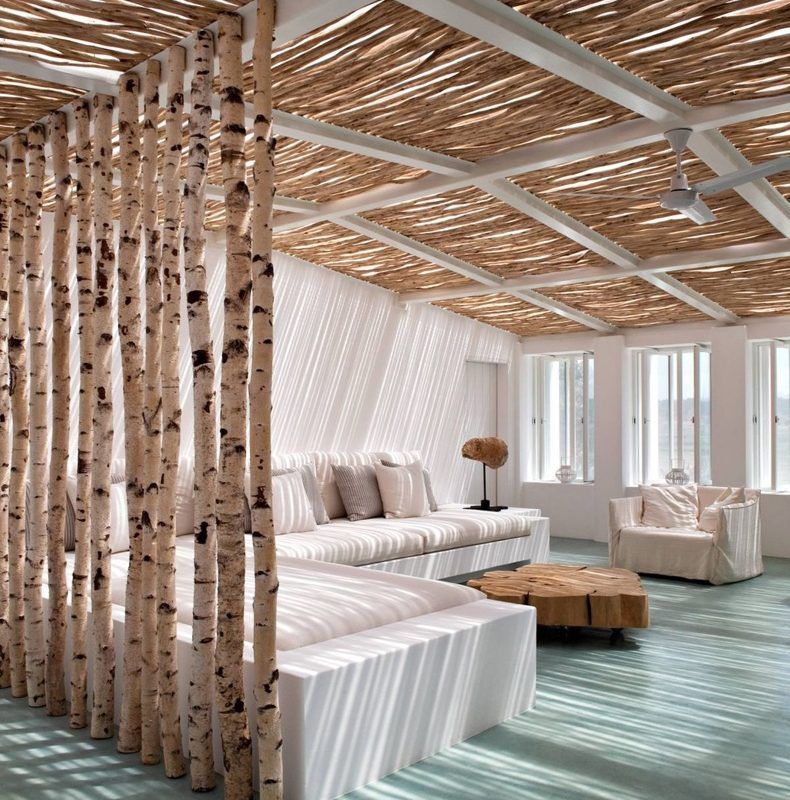
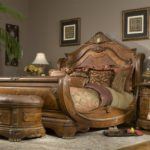
- Birch Wood Projects: Unique Wood Headboards
- Birch Wood Projects: Lamp Bases
- Birch Wood Projects: Birch Flower Vase
- Birch Wood Projects: Baltic Numbers
- Cutting Birch Boards
- Build a Birch Tree Light
Birch is often used in a great variety of birch wood projects, because it’s unique and beautiful hardwood tree, it’s fine grained color and satin-like sheen. Some of these projects are so simple, and if you want to explore some of modern DIY birch wood log projects for your home decoration with this beautiful material, here are some examples to explore.
Probably everyone reading this asked himself a similar question: what to do with birch logs? Or what can you make with birch wood? Well let’s go over some options!
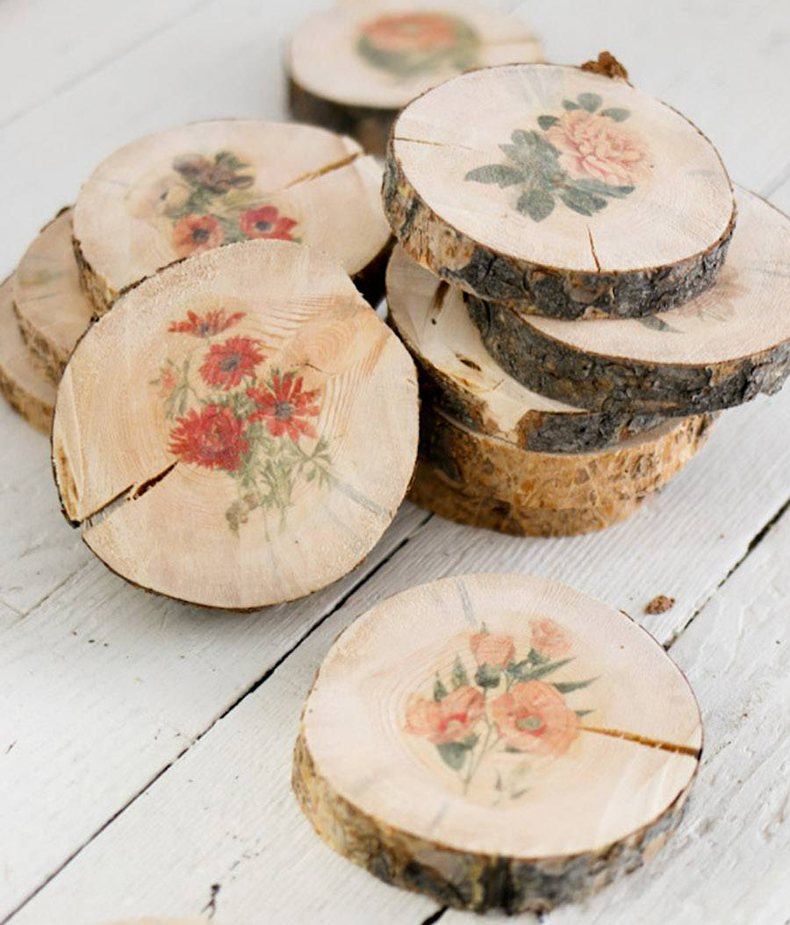
Plain Wood Coasters
Minimum materials and efforts you’ll need for making several plain wood coasters. Even birch wood leftovers can be used in this project. Just make several wood slices, take tracing paper and choose an artwork or a printout you want to decorate coasters with. After tracing the printout, paint slices and that’s all!
Birch Wood Projects: Shelves
There are many ideas of birch wood shelves that a great for storage or display of anything. Making wood shelves it is popular to use birch branches for supporting shelves. At the same time these elements decorate shelves as well as the entire interior of the room and make beautiful and unique look. It is a great idea for the DIY project in your home.
Birch Wood Projects: Bark Lamps
Using birch bark for making a lamp is not only interesting idea, but also an easy task. If you want something like this, take several appliances: twine, leather punch, utility knife, electrical wire, light bulb, and of course the bark. Choose the desired size and cut the bark. Then, cut holes to let the lampshade come out. Use the twine to switch ends of the bark and finally install the lamp.
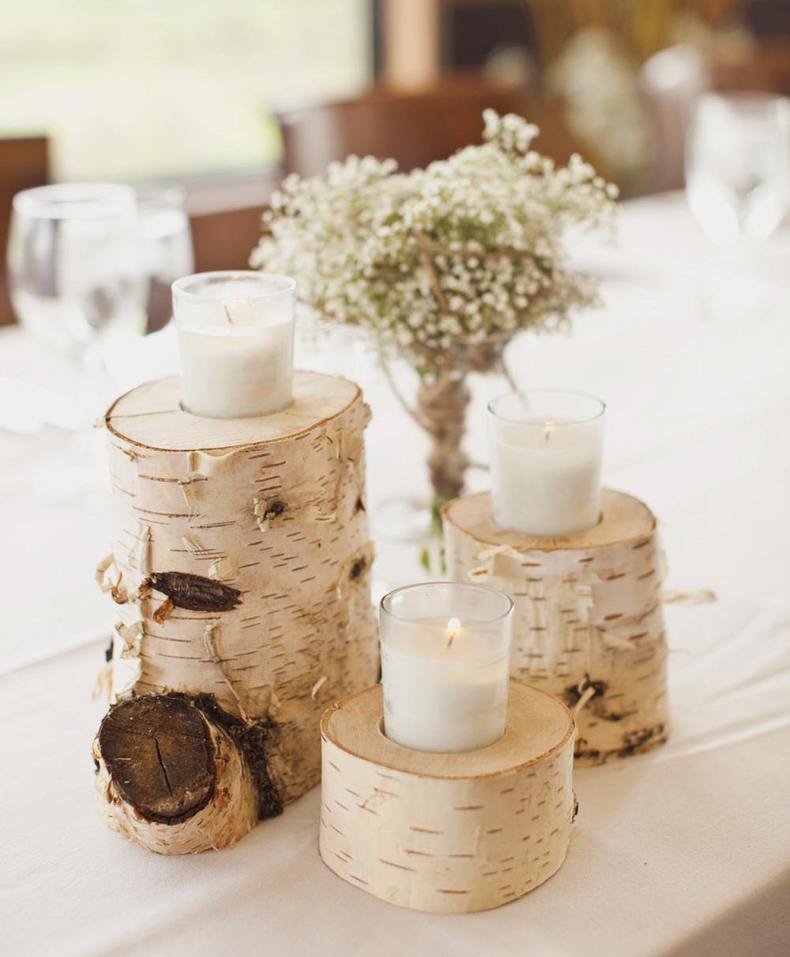
Birch Wood Projects: Candleholders
Another idea which is easy to make is a candleholder. Take several fallen birch logs. You will also need a drill and a saw. Choose the size of each candleholder and cut needed hole in each log. Later, in these recesses you will place candles. This idea is especially cool for winter when people most of all want to add coziness to their homes. If you do not know how to make a log lamp, use this idea and you’ll like the result.
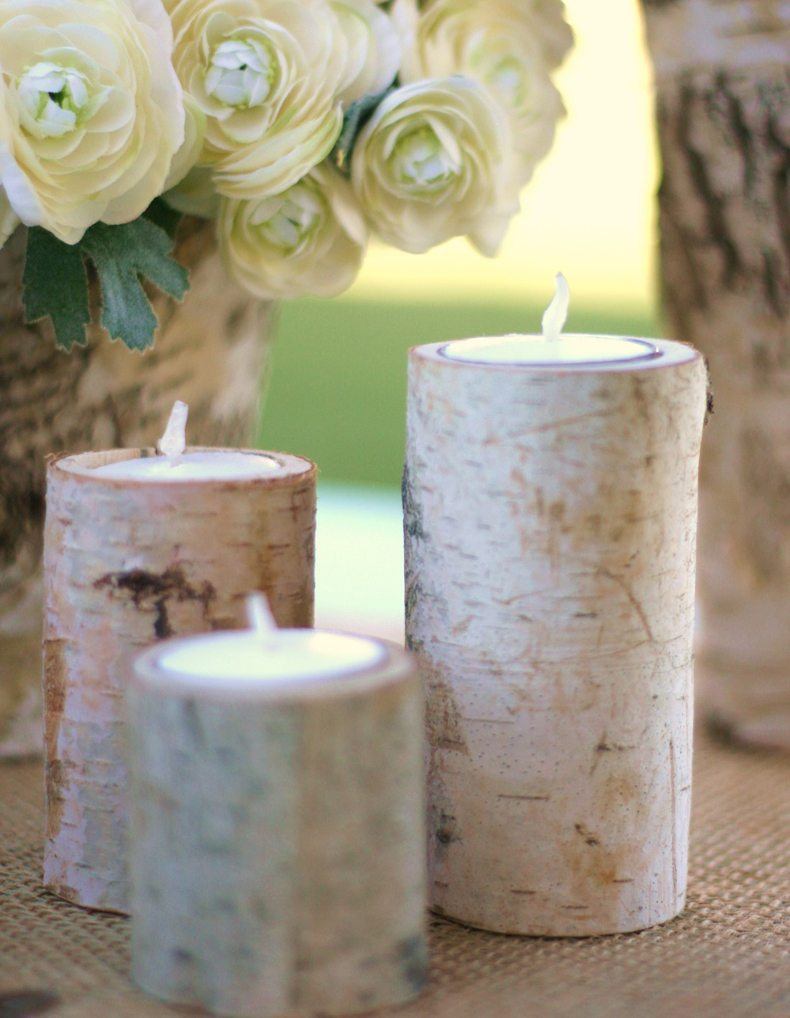
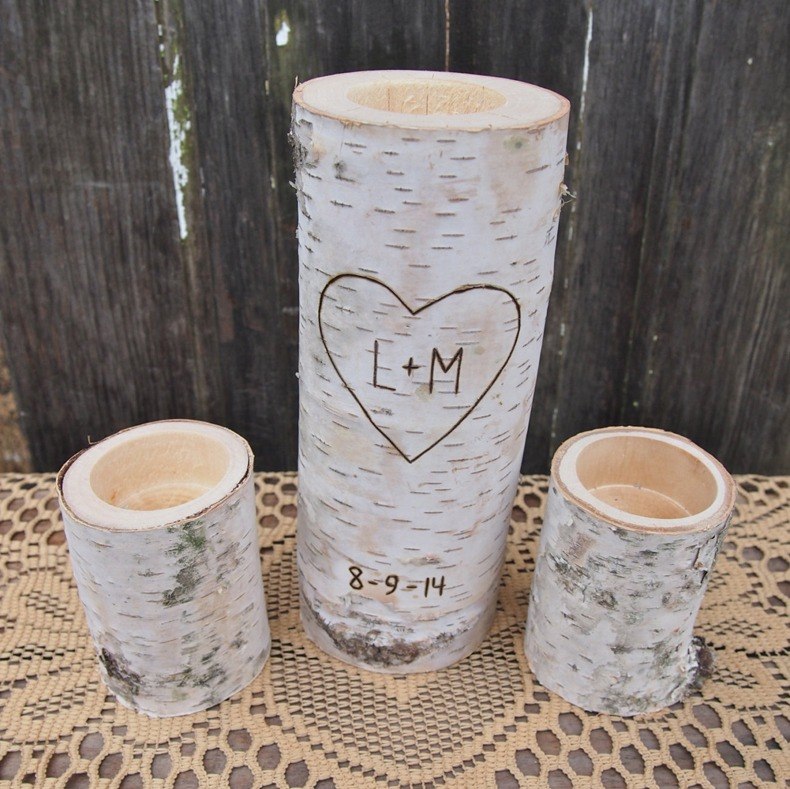
Birch Wood Projects: Personalized Candleholders
This idea in general is the same as previous one, except couple differences. Use reclaimed birch logs, cut them to needed size and put there your initials or any other inscription you want. This way you can easily personalize the candleholder or make the same for someone else as a surprise.
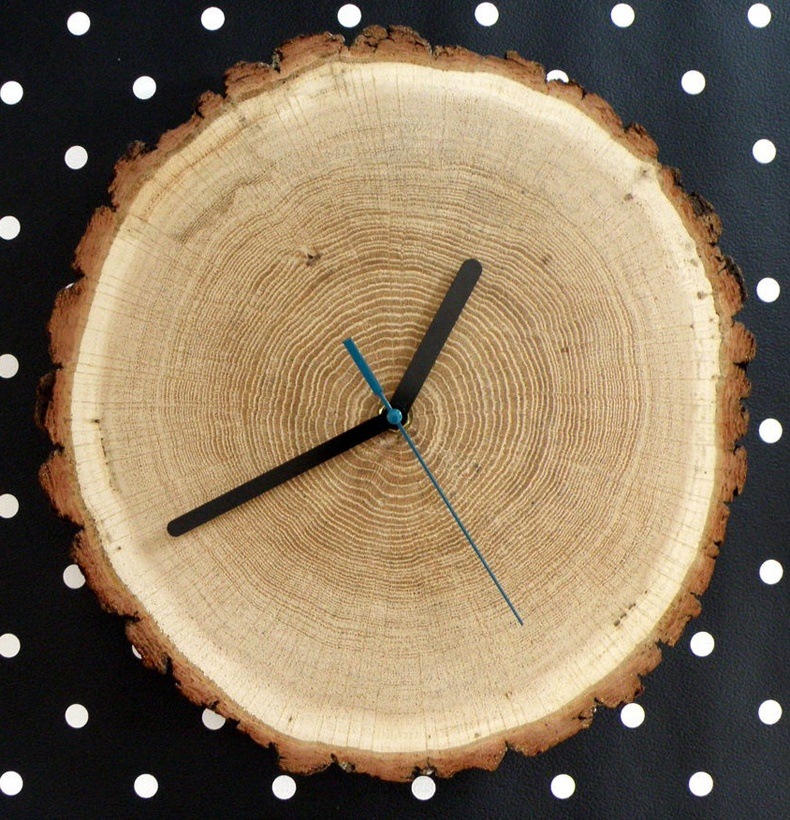
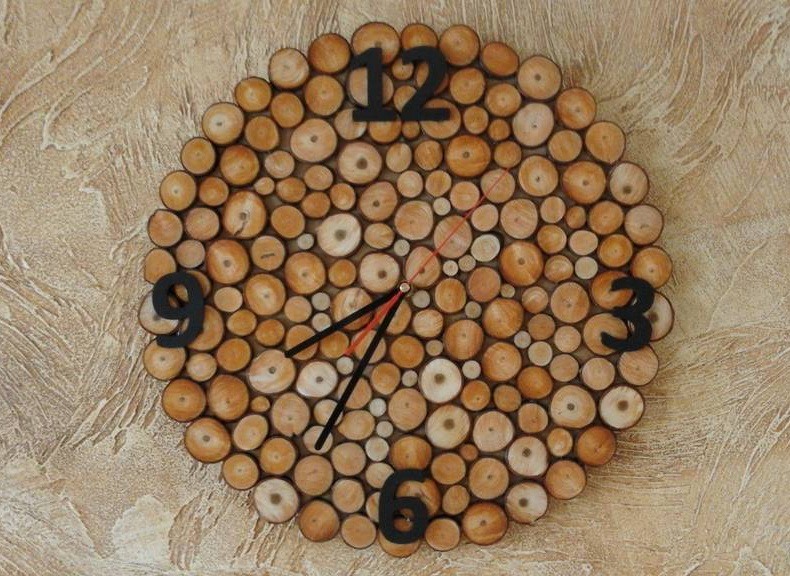
Birch Wood Projects: Wood Clocks Handmade
This is very beautiful idea for a handmade clock made of wood. Any wood clock handmade can be made of reclaimed birch wood. Make wood slices and put them together as a mosaic. Now you have unique pretty clock. Use slices of different sizes and no one ever can make the same clock.
Holiday Birch Decoration
Christmas and other holidays always need some decorations. Birch wreath DIY project is great option for those who want to stand from the crowd. For this project you’ll need a drill, moss, screws, hot glue, some chicken wire and the most important – birch logs. First, cut birch logs at an angle of 15 degree. Attach logs to each other with the help of screws and decorate the wreath using succulents, moss or whatever you want.
Birch Wood Projects: Table Numbers
Birch logs can also be used for making table numbers. Just make sure that each log is cut straight to stand still on the table. Now you have to write numbers on the top of each log and table numbers for special occasions are ready.
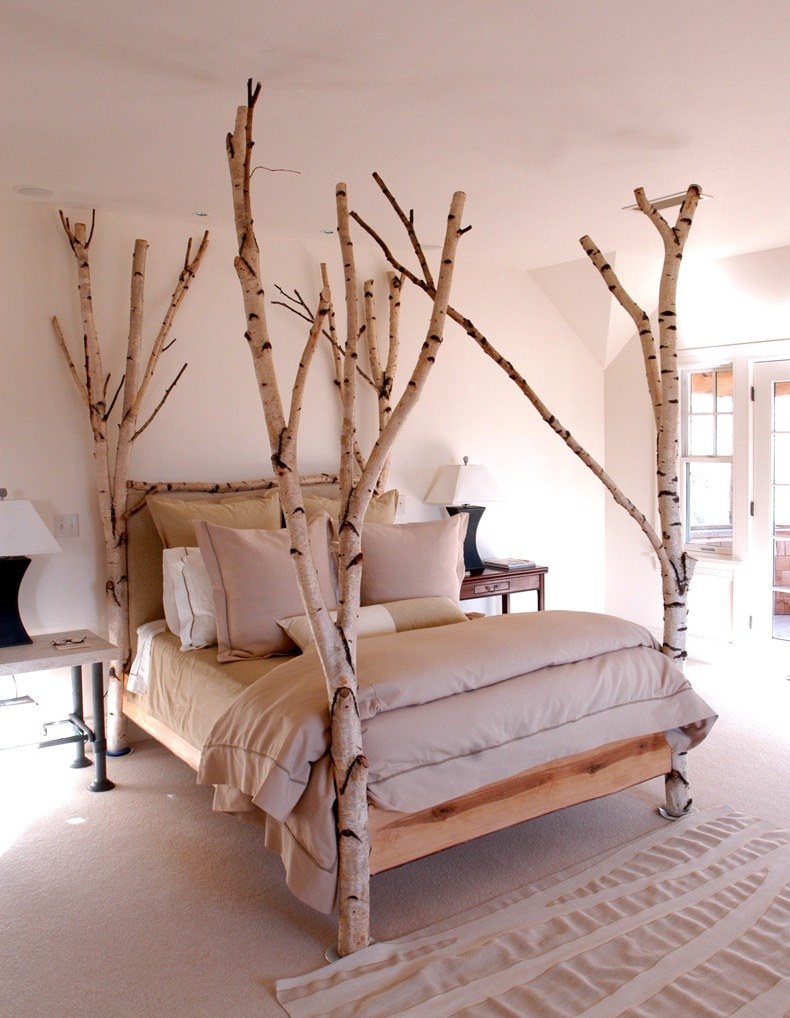
Birch Wood Projects: Unique Wood Headboards
Wooden headboard is a dream of almost all people on the planet. With the help of birch logs you can make unique wood headboards and make everyone envy you. Take two bigger logs and three smaller ones. Place large logs on each end of the bed – here is the support of the headboard. Then place three other logs horizontally and attach them to the support logs with screws or nails.
Birch Wood Projects: Lamp Bases
If you want, but do not know how to make a log lamp, here is a nice idea. Easiest but not the worthiest way is to take a branch of birch tree and use it as a base for your lamp. It will give the perfect stability to the lamp and there will be no chance to find the same one anywhere in the world. You can also take several branches and attach them to each other the way you like or want.
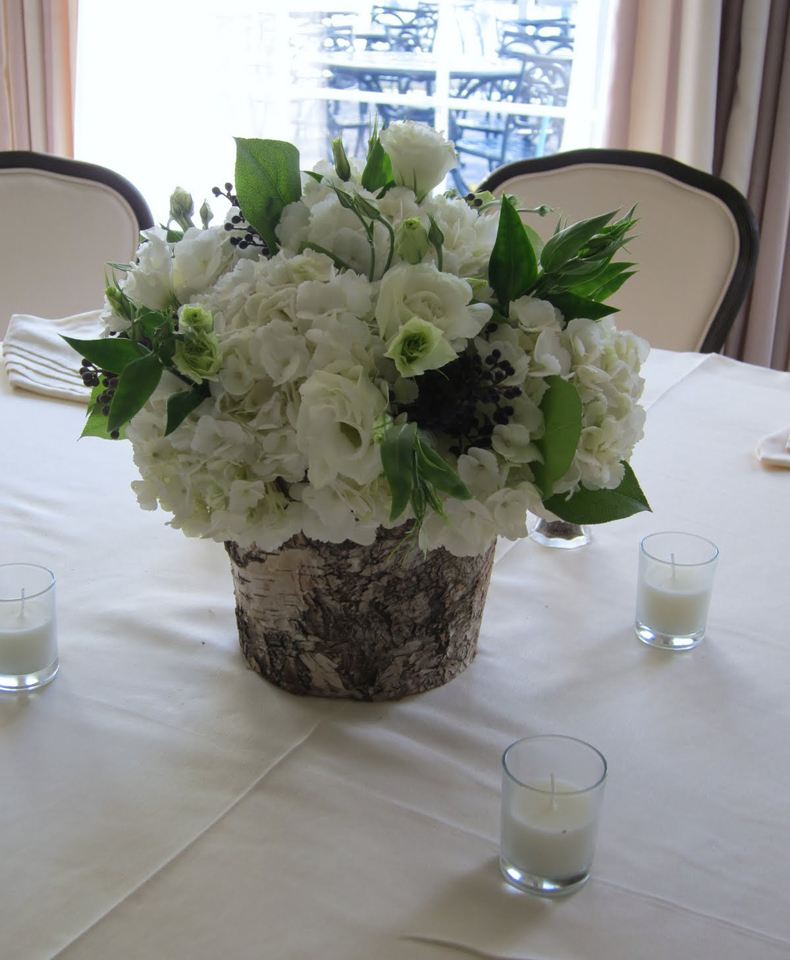
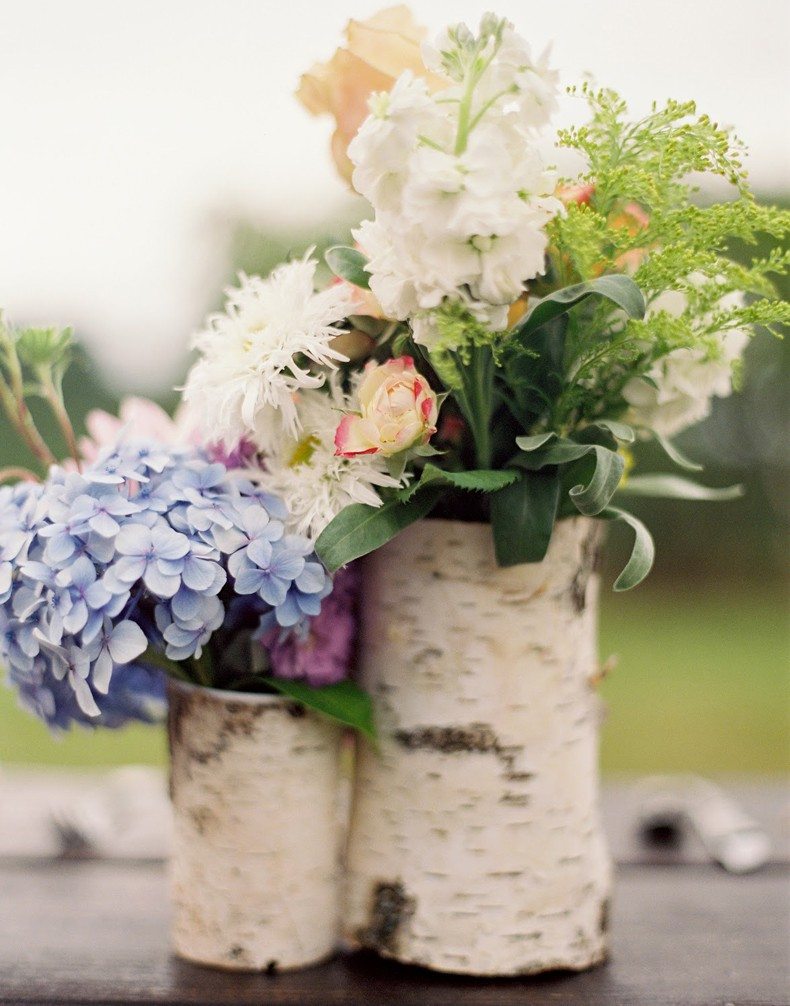
Birch Wood Projects: Birch Flower Vase
To make a birch flower vase take an old jar. Also take a bark and twine. Wrap the bark around the jar and then wrap the twine around whole piece, so that it fits tightly. Now you have only to fill your new beautiful vase with flowers.
Birch Wood Projects: Baltic Numbers
These numbers offer you tons of flexibility in your birch wood projects needs. While mainly used for indoor home decor, these numbers offer size and font options that you wouldn’t normally find in any craft or hardware store. So you won’t have to skimp on creativity in your design. Baltic birch wood numbers can be ordered in varying heights from 1 inch to 48 inches tall. You can also customize the thickness from 1/8 inch to 2 inches. If that wasn’t variety enough, you can order these numbers in over 100 fonts and nearly forty color options. From clock numbers to nursery decor, we hope these baltic birch wood numbers help you find exactly what you need for your birch wood projects.
Cutting Birch Boards
So, firstly you’ll cut some lengths of birch. After cutting a bunch, fill the pickup box. And when the box is full, you can bring all this wood home. Then it’s time to cut some boards. When it’s done, you can put it in place. The first thing you’re going to do, is cut two corners off each log. To do so, screw a two by eight to a log. So cut the first corner. When it’s done, screw the two by eight on the fresh cut and return to the saw. Now, you have to repeat all the same operations for the rest of your logs.
After a while, you have a nice pile of logs with two straight sides. But this is only part of what you brought back. To transform those into boards, you need to put your rip fence. And set it for a five quarter cut and now you can really start to cut some boards. One thing for sure, you can’t complain about not having enough power on your saw; nothing here is fast forwarded. But cutting that many boards makes a lot of sawdust; you need to clean the drawer from time to time.
When it’s empty, it’s time to cut more boards. When you’re done you have a nice pile of cutoffs on the floor; you need to cut all of those into firewood. Now you have a nice pile of boards. Before piling them for drying, you make a fresh cut on all their ends. You need to protect all the ends, so you brush a coat of old paint on every end of every board. When you’re done, the trailer is full of boards. So it’s time to bring all the boards inside the shop and sort them by length on your workbench. Then pile the boards. And here’s you nice pile of birch boards.
Build a Birch Tree Light
I’m gonna show you how to make a bucket branch light using a bucket, a branch, and some lights and some concrete. Okay let’s go! I’m using just a standard bucket and use a lot of these in the construction industry when they get broken though, I tend to just throw them away. So this is a great DIY for that old used bucket and the goal here is to make it look like not a bucket, so I’m gonna cut the lid off.
How am I with tools? I’m see. Go for it! So rewarding. That was amazing! It takes me a little while to get warmed up and then I love it. It’s weird because today I did not take any time to get warmed up. Now I’m just gonna sand the rough edges and I’m not gonna go around the side like that because what that does is scratches it and then you see it through the paint so I’m gonna kind of hold it straight on.
Really just to clean it up. Give it a nice clean edge. Okay I’m happy with that. So I really want to change this bucket into a planter and the best way I can think of to do that is to paint it and I think matte black really does that for me. So I’ve actually prepped one that I’ve got ready and it’s dry.
Have you ever made anything with cement before? I actually never have. Well this is the perfect job! Any time I’m mixing cement, put water in before the cement I’m eyeballing it. My “pancakes” might be a little weird but that’s okay. What I’m gonna do is just pour this in. So I’ve used one two three four mini bags. Let me take over a little bit there. I’m just gonna get the side. I would say that’s good I always like to just run the drill at the end or along the top. Exactly like a blender. Do you want to grab some concrete and throw it in the bucket? It’s just literally like giant handfuls. It’s like playing in the mud.
I’ve got a couple inches of cement in the bottom of my bucket and now I’m just gonna place our branches in and this is where we get artsy. I can kind of just stick it in there. Do you want to take one? I’m gonna keep going all angular. Probably I’m clearly an experienced DIY-er. I like to look, reset. You must buy a lot of old furniture from the ReStore for your DIY’s. It’s just a nice way to update a room with not a lot of cost. So I’m gonna move this one aside and I prepped one for me that I’m gonna go get.
So here’s one that is fully cured and ready to go. Love it! So I can attach my lights. It’s bling time. I’m gonna put our battery packs in the bottom and then I’m gonna start wrapping. I think I want it pretty tight so that it holds the air that doesn’t move or slide down. There’s two battery packs. It it looks so pretty! It looks amazing! This could be inside, it could be it could be both. You know, it’s adding ambiance it’s really inexpensive. And it’s beautiful! I love the indoor-outdoor vibe of this sculptural light piece. It’s a mix of modern and rustic and it’s really functional. Not to mention the fact that it costs 20 bucks.


5 Comments
This really replied my problem, thank you!
Not at all!)
Really fine post, I surely adore this site, keep on it.
Great post. I’m facing a couple of these issues.
I simply want to say I’m beginner to blogging and site-building and really loved your web page. Probably I’m planning to bookmark your blog post. You absolutely have amazing articles. Appreciate it for revealing your website.